Placing a menu within a page
The Drupal Kit’s header area displays the main menu’s first and second levels (L1 and L2). To show deeper levels, place “Menu blocks” on individual pages or groups of pages.
There are two ways to place menu blocks on pages. To place a menu block in the layout of the general-purpose Flex Page, use Layout Builder. To assign a menu to display in a region of the site on multiple pages, use the Block layout page, described below.
Contents
Place a custom menu on a page with Layout Builder
On any page that has a “Layout” tab, click the “Layout” tab.
Find the layout region where the menu should display and click “Add block”.
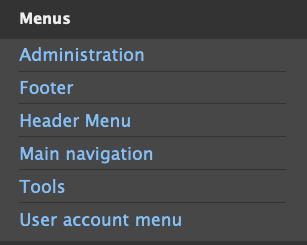
In the settings that appear at right, scroll down and choose the desired menu from the “Menus” section:
Before placing the block, configure the display options explained below.
Menu block configuration options
Menu levels
Initial visibility level: Useful for a sub-menu that will appear on a collection of pages. This will only display when the active page matches a certain depth of a menu. For example, if you placed the main menu in the sidebar and set the “Initial visibility level” to 2, the menu would not display on pages that are the top level of the main menu, only on pages that are second-level and lower.
Number of levels to display: Useful for menus with nested children where you only want to display the first level:
“Levels to display” is “unlimited” |

“Levels to display” is “2” |
Expand all menu links: Whether child items should be visually expanded, as shown below.

“Expand all menu links” is off |

“Expand all menu links” is on |
Tip
Tick “Show as expanded” to make a menu item a display as a parent item (L1 link)
Fixed parent item
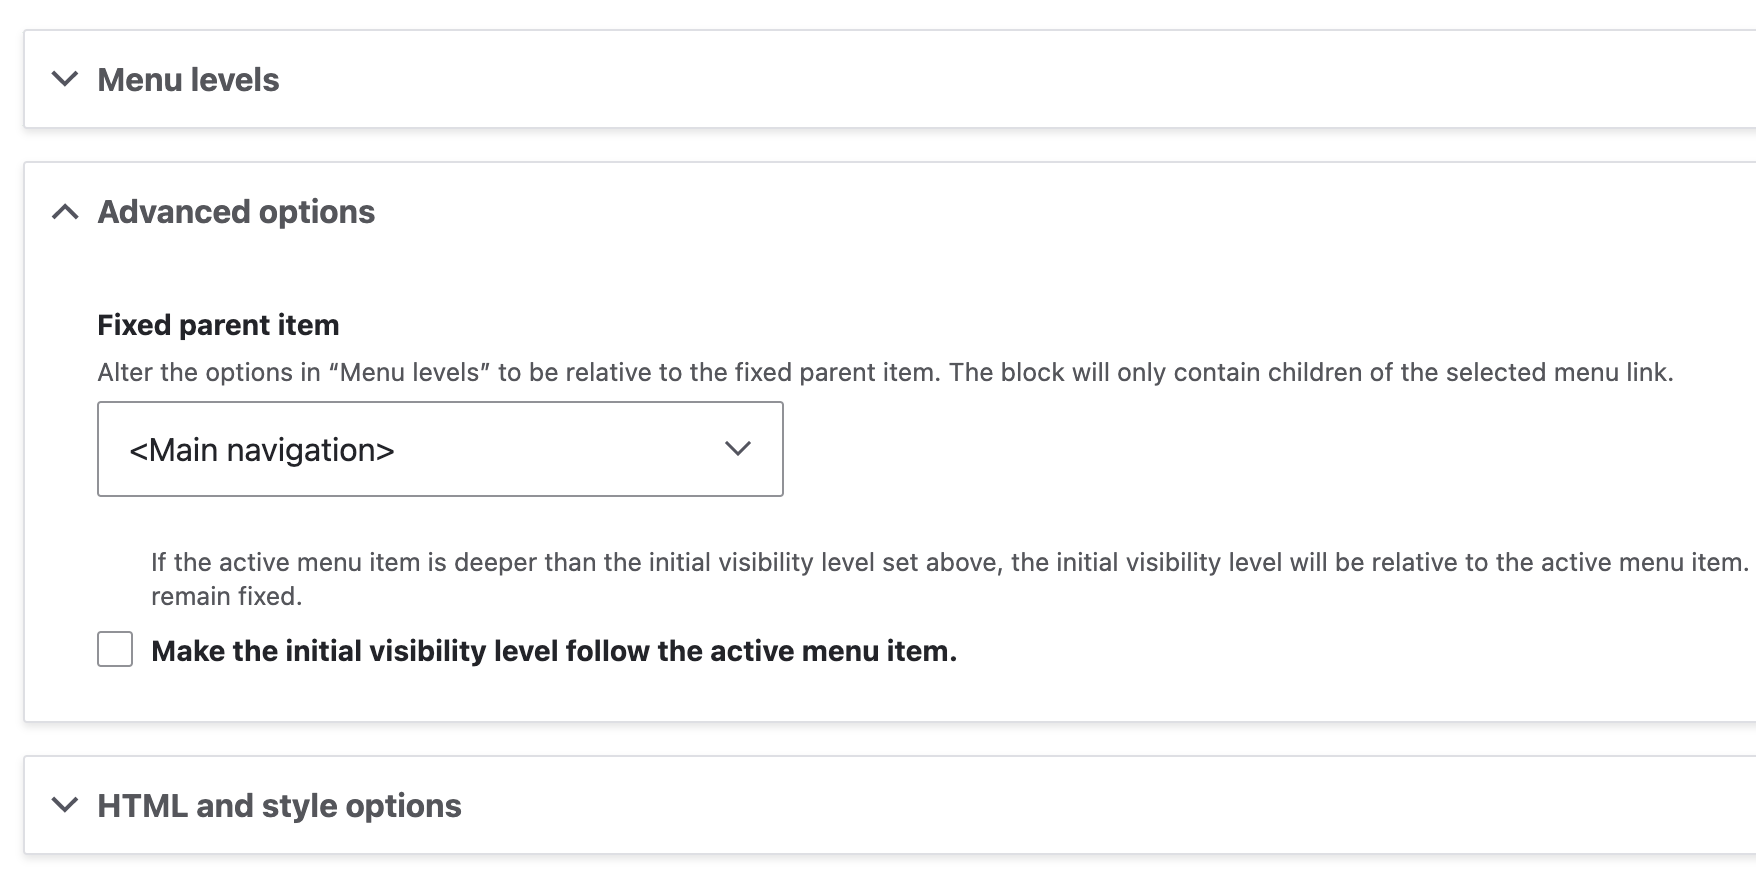
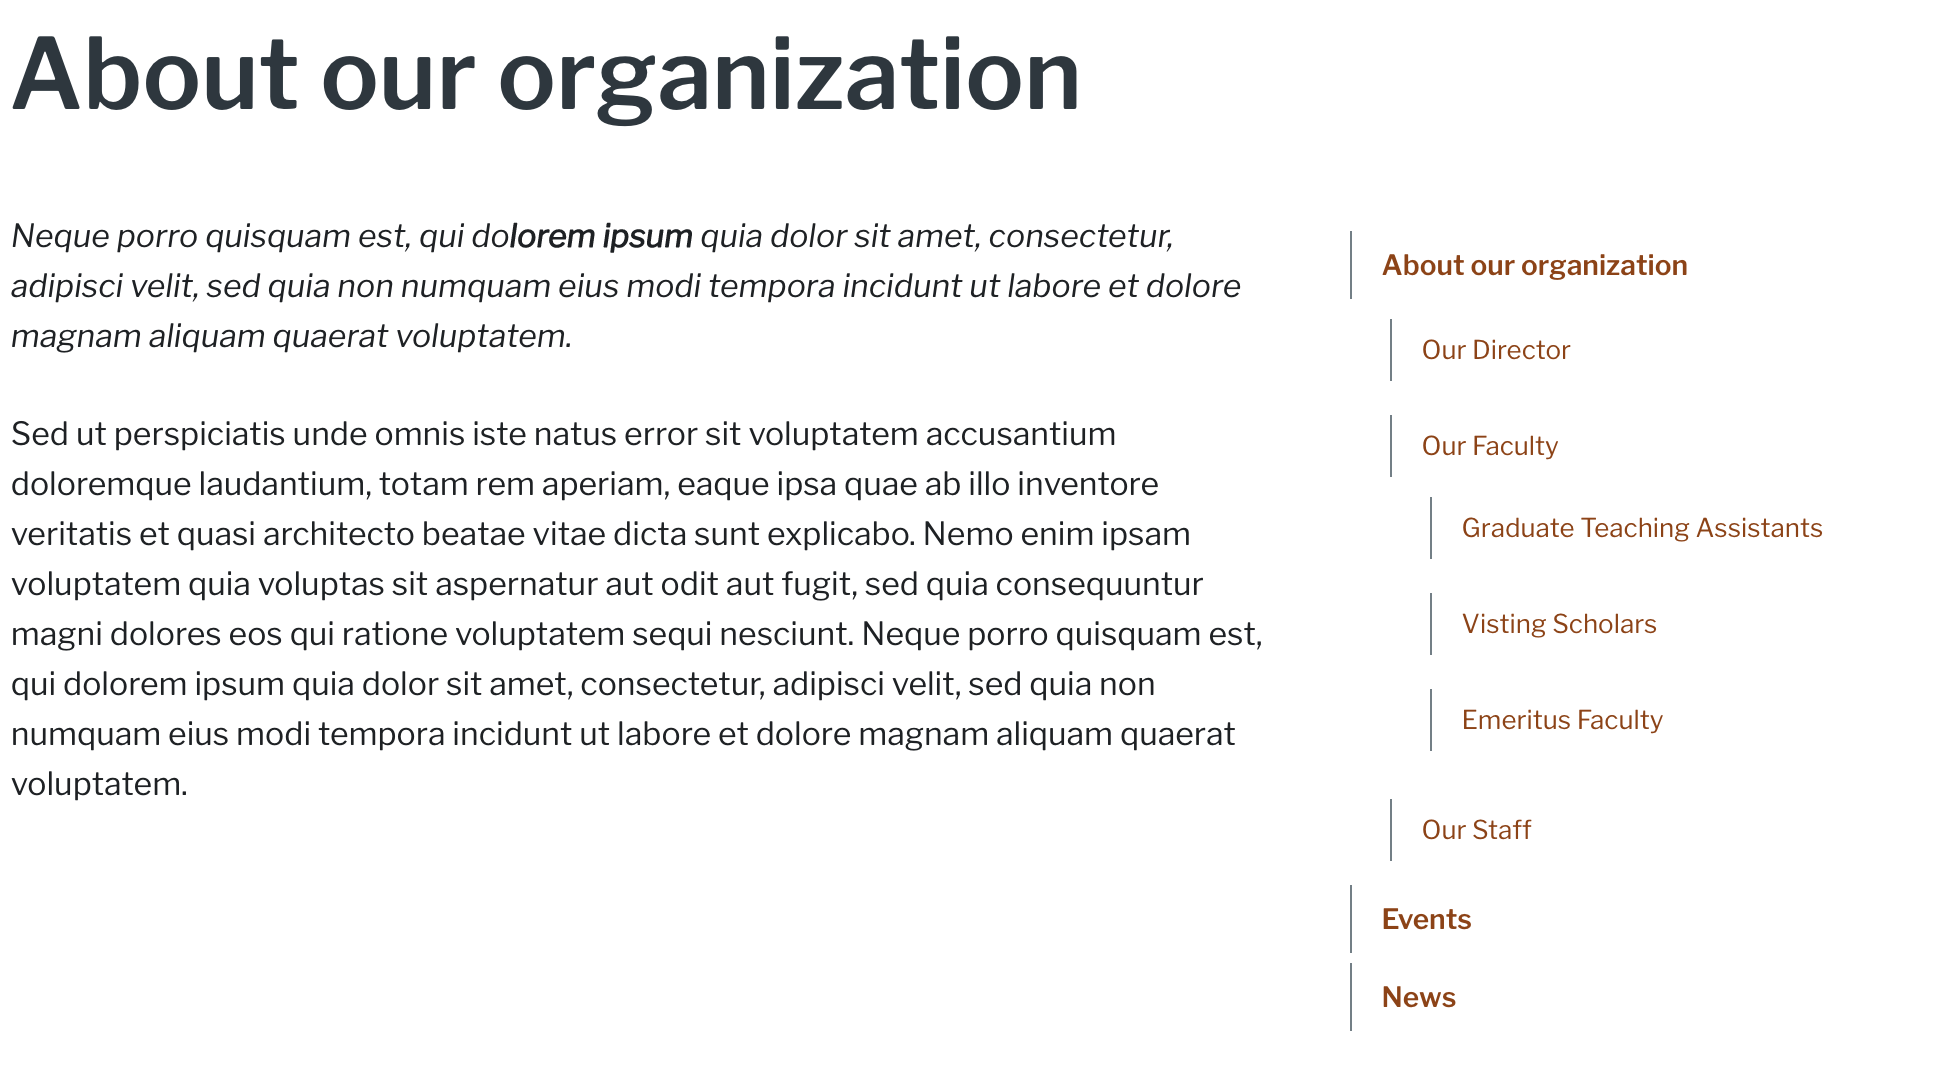
Use this option for showing a section of a larger menu. Example: you have a group of pages related to your organization’s faculty organized within your main menu. On faculty-related pages, you could display the main menu starting with the faculty overview page:

The entire main menu in a page sidebar |

The main menu with “Our faculty” as the “Fixed parent item” |
Configuring the fixed parent item to link back to the corresponding parent page is a helpful navigation aid for users. There are several steps for configuration:
Step 1: Select “Display title” box at top of Configure block, just under “Title” field. The text in Title field will be overridden by the fixed parent item. The checkbox enables a new dropdown list under “Fixed parent item” called “Use as title.”

Step 2: Choose “Fixed parent item’s title” from the list of options. This selection enables a new checkbox below the dropdown.

Step 3: Select “Link the title”:

HTML and style options
Theme hook suggestion: this is for developers who want a different template for a specific menu.
Style
Two other self-explanatory style options are “Border with background” and “Border without background.”

Configuration options when adding a menu with Layout builder
Place a custom menu on a page using Blocks layout page
Go to Structure > Block layout (
/admin/structure/block).Click “Place block” in the desired region.
Locate the menu and click “Place block” again:

The “Place block” interface
Once selected, the “Configure block” interface appears with display options. You can also select the region where the menu will appear. Changes take effect after pressing “Save block.”

The “Configure block” interface