Integrating external content
Contents
Instagram
New Instagram API, December 2024
If you were displaying Instagram content on your Drupal Kit site before December 2024, you will need to switch to a new integration following the steps below. You should also delete the previous Instagram integration, located at Configuration > Media > Instagram account configuration (/admin/config/media/utexas-instagram-api/instagram-authorization).
META (formerly Facebook), which owns Instagram, provides a developer portal to authorize websites to display specific Instagram content. Setup involves specifying information about the website and then approving the integration from Instagram account(s).
The entire process, summarized:
Configure your Instagram account to be a “Professional” account.
Create an Instagram “app” within META.
Authorize your Instagram account to use this app.
Connect the META app to your website.
Display Instagram content on your website.
Step 1: Set up a Professional account on Instagram
Note
Designating your departmental Instagram account as a Professional account does not involve any payment information; it is simply an account type that allows for additional integrations. For more information, see About professional accounts on Instagram.
To set up or switch your account to Professional, follow the instructions at How to set up a business account on Instagram.
You do not need to share logins using Accounts Center (Step 8).
Step 2: Create an Instagram App
Purpose
Create the underlying mechanism to authorize websites to access Instagram accounts. One app can authorize multiple Instagram accounts. The official documentation on this is at Create a Meta App for Instagram Platform, but the below steps provide a streamlined version for the minimum amount of configuration required.
Sign into https://developers.facebook.com/ . Sign in with a departmental account so that access can be shared with others in your organization.
Once authenticated, click on My Apps in the upper right (https://developers.facebook.com/apps/).
Click Create app (https://developers.facebook.com/apps/create/)
Add a display name for the app. Note: you can’t use the word “Instagram” or “Facebook” in the title.
Under Add use cases choose “Other.”
Under Select an app type choose “Business.”
Click Create app.
Under Add products to your app choose “Instagram” > “Set up”. You should now see the following dashboard:
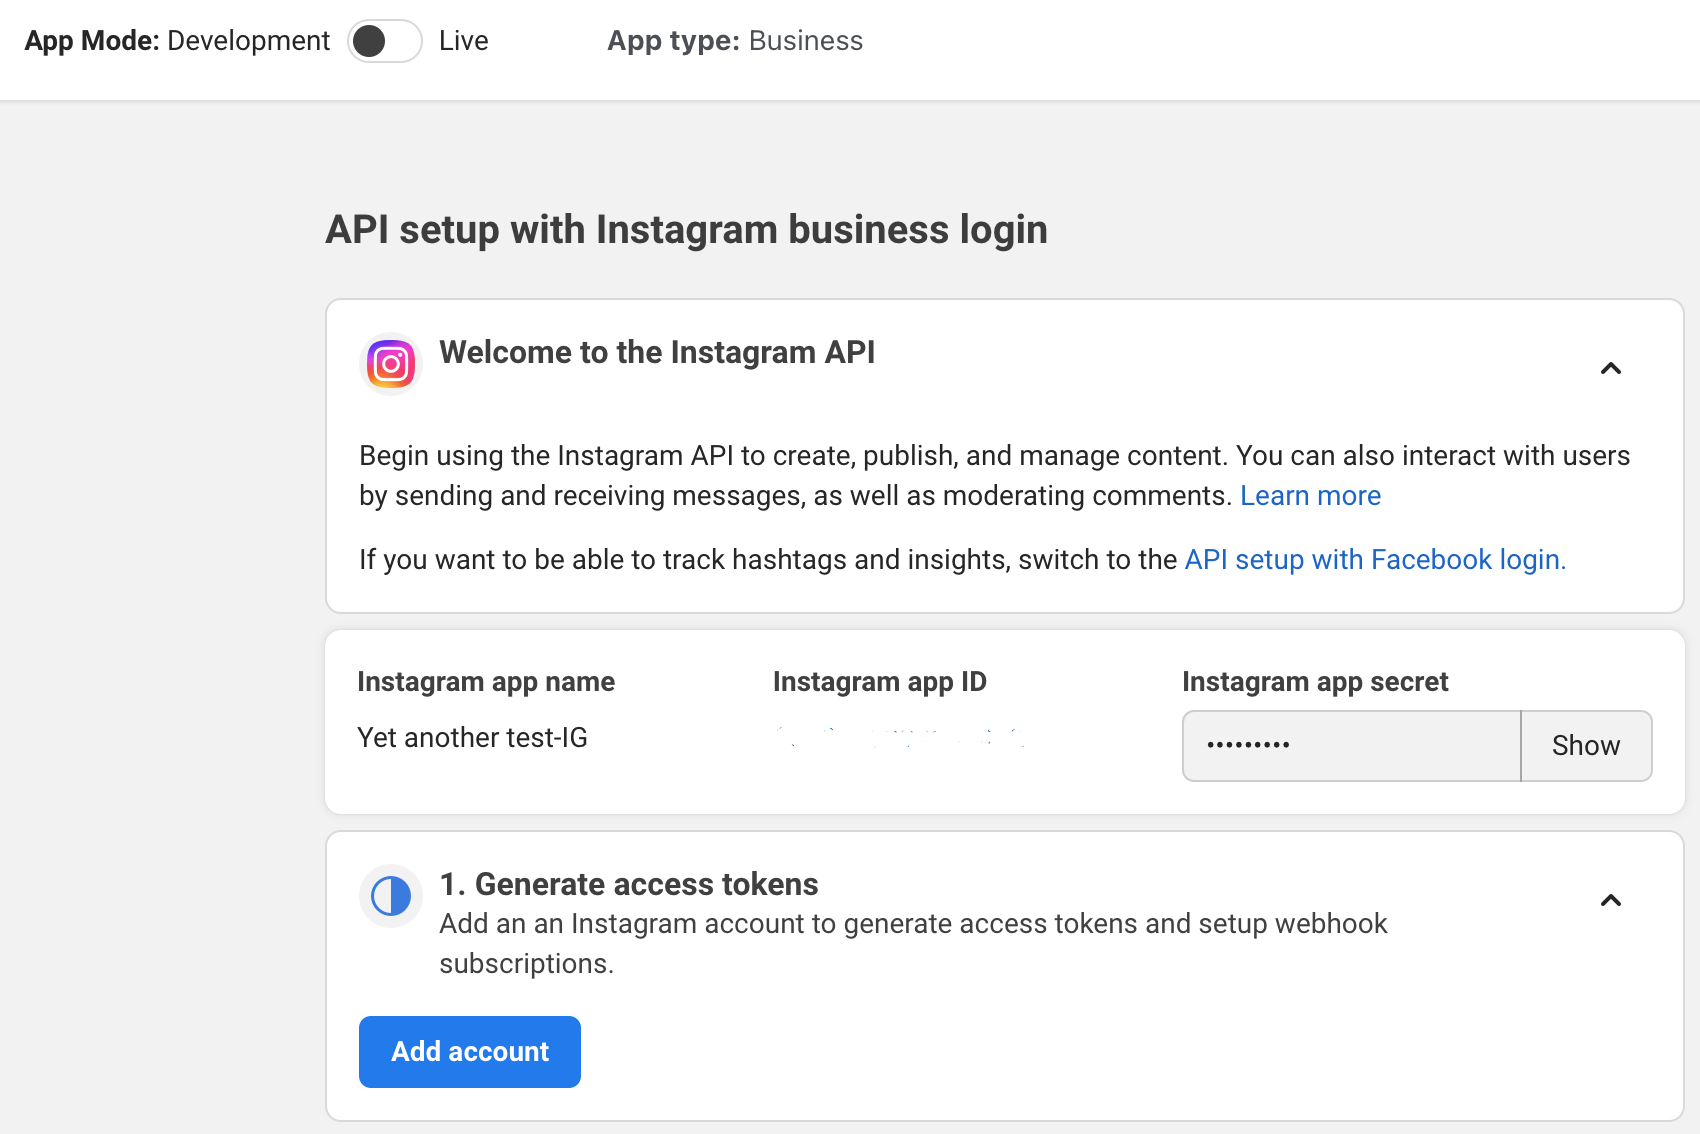
On this page are the “Instagram app ID” and “Instagram app secret,” which you will need later on. Bookmark this URL or copy these credentials into a secure but more easily accessible place.
Scroll down the page to Set up Instagram business login and click “Set up.” This will open a pop-up where you will sign into Instagram with your departmental account.
For Redirect URL add the following URL, replacing
example.utexas.eduwith your site domain. Note: the trailing slash is important!
https://example.utexas.edu/admin/config/media/utexas-instagram-api/instagram-authorization/
Step 4: Connect the Instagram app to your website
Purpose
Grant access to the website to retrieve information from an Instagram account.
- What you’ll need:
The
administer site configurationpermission on your account in your site, which you will have if you have the Site Manager role.Credentials for the Instagram account you want to display on the website.
Credentials for the Instagram app you set up in Step 2.
Sign into your website.
Go to Configuration > Instagram Account Configuration (
/admin/config/media/utexas-instagram-api/instagram-authorization)Click Add Instagram account authorization (
/admin/config/media/utexas-instagram-api/instagram-authorization/add)Add an identifying label, such as “Landscape Architecture Instagram”. This only shows up internally when adding an Instagram block to a page; it should be used for distinguishing multiple Instagram integrations in your administrative interface.
Add the Instagram app ID and password that was generated in Step 2. These values are located in
https://developers.facebook.com/apps/YOUR-APP-ID/instagram-business/API-Setup/.Leave the “Developer Information” section as-is.
Click Create new authorization.
This will redirect you to Instagram. Sign in with the credentials of the Instagram account you want to display.
This will present you with a screen to allow access, like the screenshot below. Click Allow.
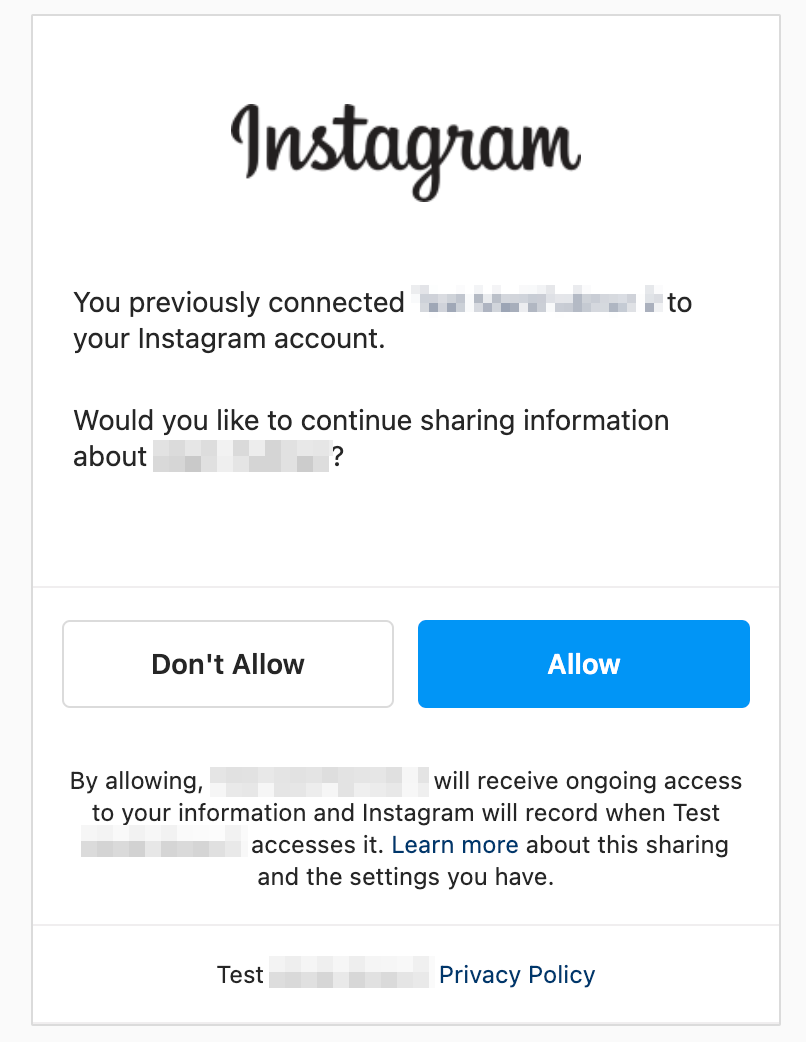
The connection will be successful if you are sent back to the your website. Verify this by clicking the “Edit” button next to the “Instagram Account Authorization” and confirming there is an “Access Token” populated at the bottom of the screen.
Step 5: Add Instagram content
As with other content blocks, Instagram content can be created either as page-specific or site-wide content. When you create the block, you will choose which Instagram account to display and whether to display a title and then place the content as you would any other block.
University Events (Localist)
University Events maintains a centralized event calendar at https://calendar.utexas.edu where CSUs can display organizational events. Events hosted there can also be displayed within Drupal Kit sites using embed code provided by the Localist Widget Builder. Demonstrations of different display options and integration instructions are located at https://demo.drupalkit.its.utexas.edu/localist-widgets.